1971 Eco fiberglass camper restoration

Trying to put an egg (camper) back together again.

The more or least restored trailer, ready for camping.

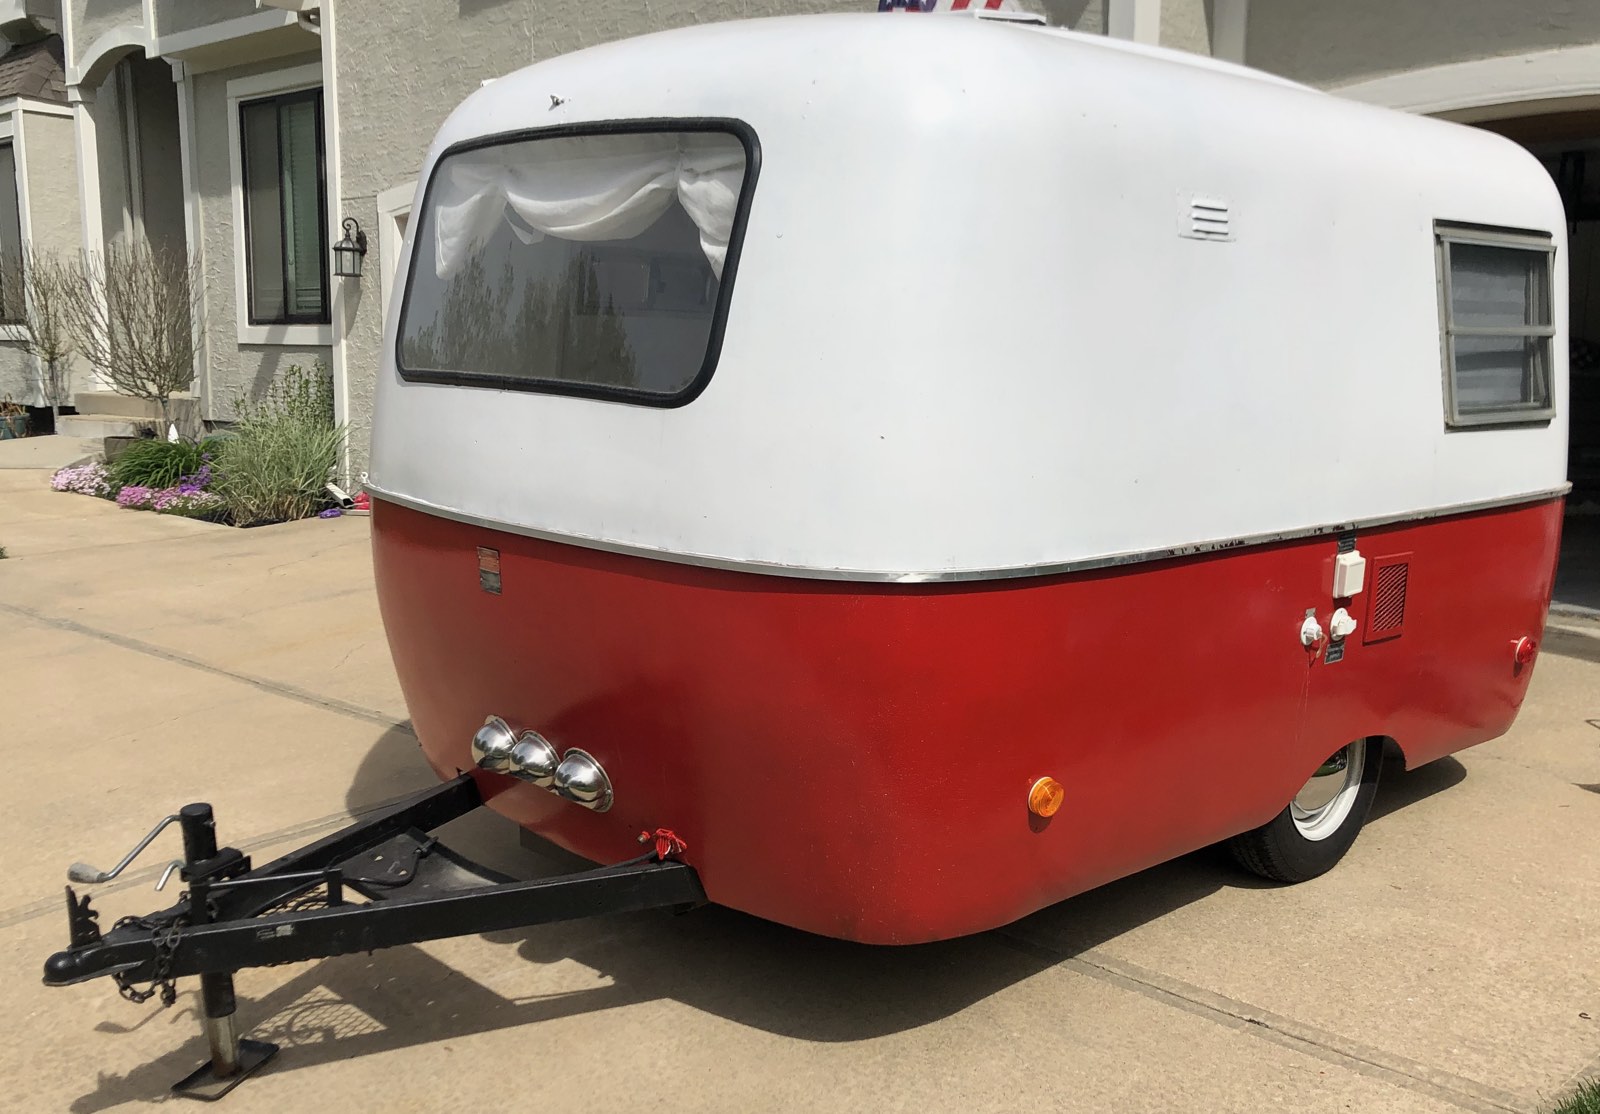
1971 Eco camper restoration

In 2019 I became convinced that we should have a camper. And not just any camper, we should have a fiberglass "egg" camper. Through a highly improbable coincidence, it turned out a friend had one and he was willing to sell it to me for "friend price." And so I lugged this little thing home. The pictures and story here are incomplete and fractured because I'm recreating the restoration story from whatever files I can find, but I'll recreate it as best as I can.

As I found it, it had seen better days. It looked a bit like a baked bean, and smelled a lot like old, rotten beans.
It just *barely* fit in my garage bay. That made the restoration a lot easier. Just go out to the garage and get to work.

As an Amazon Associate I earn from qualifying purchases. In other words, I get commissions for purchases made through links in this post. When you follow a link and buy something, it doesn't cost you anything extra, but I may make buck or two. So thank you! That said, any recommendations I make are my recommendations, based on my experience, and are not paid endorsements. I only point you toward the stuff I use, and if I don't like it, you'll hear about why.

So what is this thing, anyway?

In the '60s a company called Boler pioneered these little fiberglass "egg" campers. Where most campers at the time nailed aluminum into a wooden structure to make the camper (or in the case of Airstream, an aluminum frame) these were different: there was no framework for the body, because the fiberglass is self-supporting. So they're extraordinarily lightweight, easy to tow, and much less likely to break, leak or just fall apart.

Through a complicated series of events I won't get into here, Boler's original fiberglass molds ended up in the hands of a bunch of different manufacturers, including this Eco, which was built in Nebraska in 1971. I'm told the factory later specialized in fiberglass prosthesis when they got out of trailer-building.

Anyways, the original Boler design continues on today under the Scamp name. Pretty amazing longevity, but great design endures. If you're interested, there's a lot of history about them out there.

Here's the original Boler floorplan, still in use in Scamps today (and in my Eco). Photo courtesy of Scamp Trailers.

The teardown

I was lucky it was such a great design and couldn't rot. At least I didn't have to worry much about the body. But everything inside sure could rot. And had.

When I brought it home, my wife would not step foot in it. To her credit, it really was pretty disgusting. There was carpet in it that had seem some terrible things and a smell that could stop traffic.

Underneath the disgusting carpet the original  super-70s linoleum was still in place, albeit covered in 50 years of funk. This is the dinette side of the grailer. A few hours after this picture was taken, the cushions and linoleum joined the carpet on the curb-side trash pile.
Underneath the disgusting carpet the original super-70s linoleum was still in place, albeit covered in 50 years of funk. This is the dinette side of the grailer. A few hours after this picture was taken, the cushions and linoleum joined the carpet on the curb-side trash pile.
There are cabinets above the sink/kitchenette area. The doors, light fixtures and backsplash were all in terrible condition.
The sink itself was no better. But it did have lots of extra holes for whatever reason.
The overhead storage and the front and rear was notable mostly for the sheer number of hooks that you were absolutely certain to hit your head on.

The very first thing I did was remove every fibrous surface from inside and put it all in the trash. All the cushions, the drapes, everything. If it was porous, it got yanked out and thrown out. I also found some other things I'd rather forget about, like the ancient camping toilet. Ugh.

Won't be wanting any of that anymore.

Everything that was left was bleached, then gone over with a trisodium phosphate (TSP) cleaning solution, and then painted over with a couple of coats of Killz. There was a lot of mold, a pretty good ant infestation, and a couple of dead rodents.

Too much of it looked like this. No, I don't know what all that was, either. But it smelled as bad as it looked.
By the time this photo was taken I was deep into bleaching the whole interior and hitting it with TSP and then Killz primer .
Eventually, it started to became a nice clean bare white canvas.
The fixtures and shelving, like the body, are all fiberglass. I filled a lot of holes in them. Then I filled a lot more.
I didn't have a lot of faith in this 50-year-old propane stove, nor did I really want to be cooking eight inches away from where I'd be sleeping.
Here the kitchen unit is nearly completely stripped down, with the original sink and stove gone. You can also see where I filled in some more holes on the front. I didn't need to fill the ones on top because I was building a new countertop.

Troubleshooting power issues

Having a usable electrical system in the trailer was quite a journey. When I first bought the trailer, I plugged it into 110V household power and got... nothing. As I investigated more, I learned two things:

  1. The original power center for it had long ago been gutted, with the original transformer removed and a nonsensical bit of splicing put in its place. Electricity was going places, but not the places you'd want it to go, and definitely not in the right wires.
  2. That length of household wiring laying out on the trailer tongue, going nowhere? It was hooked up directly to the 110V shore power. So it's probably good that I didn't touch it.

Seriously, the more I dug in, the more it was clear the existing wiring was just flat dangerous. Major work was going to be needed.

The dangerous remnants of the original power center.

So after some research I placed an order for a Progressive Dynamics 4145 Power Center. It's compact, full-featured and packs more than enough potential power for my little trailer.

Before I could do anything to install the new power center I had to drill out the rivets holding the old power center in place, then significantly enlarge the height of the hole for the new power center. A few minutes with a drill to mark the corners and a jigsaw to cut through the fiberglass and that was done. Note: Be sure your eyes, skin and mouth are well-covered. Fiberglass is nasty stuff.

You can see my marker lines where I had to enlarge the hole for it to fit.

But my newly cut hole was about 1/8" too wide because of the width of the old power center. So I had to turn right around and put some trim around the new hole to keep my new height while narrowing the opening a smidge.

Trimmed and caulked. You can see the red fiberglass putty filling some more holes too.

With the hole trimmed out and painted, I still had to figure out how to wire it up, which was pretty tricky and figuring out a good ground on a fiberglass trailer takes some head scratching. The Progressive Dynamics instructions were a little inscrutable, too, but with a little thought and a lot of googling, it went in.

The new power center installed (shown without its cover in this pic).

On the 110 (household) voltage side, I've got one breaker dedicated to feeding the 12v converter, one dedicated solely to the air conditioner, one dedicated to the refrigerator, and one dedicated to a 110v outlet on the front of the kitchenette cabinet. I could have put more on the circuits, but why? I don't need to, and this way there's less chance of a tripped breaker.

On the 12v side, the 4135 offers more circuits than I've yet found a use for, but the first thing I wanted to do was get some light. I found these super-low profile remote control LED puck lights on Amazon and went ahead and ordered them. It'd be nice not doing everything by shop light. I the wall-wart off the puck lights, mounted two in the front, two in the rear, and two over the kitchenette, then wired them up to the 12v supply. Success!

I was pretty proud when I wired it all up and it worked with no extra smoke the first time I flipped the switch.

And now that there's power, let there by light. I got a great deal on a set of low-profile, dimmable remote control LED puck lights dirt cheap on Amazon Prime day and hard-wired them in. There are two at each end and two over the kitchenette, all controlled from a single remote. Six lights is plenty in a 60 sq ft trailer.

Once it was the inside was more-or-less safe for humans to be in there, I hitched it up to take to a local trailer shop for inspection. I needed them to tell me that the frame was solid and straight, and remove this weird rack thing that had been added in the rear.

The strange rear rack in question. Inside you can see the freshly-Killzed interior.
With the rack gone, the bumper painted and the body halfway clean, it started to turn a bit of a corner.
The existing paint was so bad, a Rustoleum Roller job in the driveway was actually a step forward. You can get surprisingly good results with a rustoluem roller job. Seriously.
About half-way through painting it was looking pretty good. I needed more coverage, but not bad. You can also see the vent holes on the front for the AC. Those would be important later.
I painted the original wheels with Rustoleum white, too, and fitted some new baby moon hubcaps. You can also see some fiberglass damage from a long-ago blowout. Someday, when I get a pro paint job, I'll have that repaired. I did put new tires and bearings in, though.
All the exterior lights were upgraded to modern LED versions. Yes, that's another tiny bit of fiberglass damage by the bumper. It's 50 years old, it's picked up some scrapes.
I also started test-fitting a new countertop I'd make from birch plywood.
And the new flooring went it. Vinyl planks were easy to work with, worked well with the campers irregular edges and lines, and are waterproof and wear well. Pretty much perfect for this usage.

A prior owner had cut this hole for the AC, which is pretty far from ideal as far as cooling efficiency goes, but since the hole was already there I put a fresh AC in it. I spent a lot of time insulating the hot side of the AC from the cold side and figuring out how to vent the hot side. Eventually I put in three temperature-activated 4-inch fans venting to the outside. When the AC is on, they sense the heat and turn on, pushing the hot air out of the trailer.

A lot of things were being test-fit here, particularly the new countertop, a new bar-sized faucet and the backsplash. You can also see the new electrical outlet (complete with ground fault protection and two USB ports) and over to the right, the new sink waiting to go in. Both the sink and faucet were bar-sized because the scale worked better for the little camper. We decided to skip the propane stove and either cook outside or with a hotplate.
The kitchenette with it all actually in place.
I was really proud of this drawer I built from scratch, including all the mounting points. The original drawer slid out from the bottom of the stove, and both it and the stove were unsalvageable. So I had to get creative.
These fiberglass campers need supports from the floor up to the ceiling or else the ceiling can sag and they get oval-shaped. In mine, someone had taken the supports out so I had to use a floor jack to lift the ceiling and install new supports.
The supports themselves are just bits of poplar. Some Ikea pegboard helps keep things square while providing some extra utility. This is the sort of usable-yet-attractive detail I just love.
Before I tossed the old cushions I had the good sense to make patterns from them on heavy brown paper. Those were really handy later, when I needed to cut new cushions. The new cushions were cut from a 5-inch memory foam mattress from Amazon, and the houselhold electric carving knife, which is a pretty good solution for cutting foam.
I don't have an industrial sewing machine or any real upholstery skills, so I figured it was smart to farm out the actual upholstery work. We had the cushions covered in a nice high-quality marine vinyl in a sort of two-tone gray/beige color.  We deliberately kept the colors very neutral and cold. The camper is so small that even a single pillow introduces a lot of color. I made the dinette table, too. Then later I made another one, 'cause I didn't like this one.
I don't have an industrial sewing machine or any real upholstery skills, so I figured it was smart to farm out the actual upholstery work. We had the cushions covered in a nice high-quality marine vinyl in a sort of two-tone gray/beige color. We deliberately kept the colors very neutral and cold. The camper is so small that even a single pillow introduces a lot of color. I made the dinette table, too. Then later I made another one, 'cause I didn't like this one.

I had the upholstery done in the late in 2019. By early 2020, the basic renovation of the camper was done and it was a pretty nice place to be.

Of course just a few months later, as the weather just started to warm up, Covid hit, so there wasn't a whole lot of camping going on.

I turned my attention to modernizing the electronics and entertainment, and making a "smart camper" out of it. That had mixed results but was a lot of fun.

Why did I do it?

Well, I thought I wanted a camper, and I liked the scale of the renovation project

What did I learn?

Where is it?

Published