The Luxus folding bike restoration
For some inexplicable reason, I wanted a vintage folding bike.
I've never been overly cursed with good sense, especially when it comes to projects. If there is a lost cause, I'll find it. If there is a hopeless case, I'll take it on.
I should have learned my lesson from the Peugeot rebuild and found a nice easy project.
I should know to watch my local market and pay attention to what sells and what doesn't.
Did I do either of those things? Nope.

I got it into my head that I wanted a vintage folding bike, and then I had to have one.
Why? Beats me. I think I began to see old Italian Chiordas and Bianchi Nealeco's as a different sort of fun. I appreciate the cleverness of the rear stays forming a useful rack. Maybe I just wanted something to take camping.
Regardless, I read Sheldon Brown's love letter to the Raleigh Twenty, noticed it said the other european folding bikes of the era were generally much lower quality, and then I promptly went out and bought one of the lower quality examples: a Luxus Sportbike.
So what is a Luxus Sportbike? Who knows. It's labelled as being from West Germany, and per this page it may have been manufactured by any number of companies at the time. It may not even have been made in West Germany at all.
Here's what we do know:
- It bears some resemblance to some better-known vintage folding bikes with the way the stays loop around to form a rack, but it also appears to differ from each of them in the details.
- Luxus did make other bikes, although details (at least in English) are sparse. I have managed to find examples of road bikes, utility bikes and an interesting motocross-inspired kid's bike.
- This particular one isn't technically a folding bike. There is no hinge at the middle, so it technically collapses into two parts.
- This thing is unbelievably heavy. Somehow, this little thing weighs in at 34 pounds, about the same as the Raleigh Sports I rehabbed last year.
- The particular example I bought is in miserable shape.
Since the market for used folding bikes is nearly non-existent, of course my plan is to throw parts and money at this one. I want to pick up a kids' bike with some 20" alloy wheels, try to lighten up the weight, and just generally see if I can make this thing decent to ride. No matter what, it'll be interesting.
So, with that in mind, I started tearing it down.


February 2021: Cleaning and sanding the Luxus
The Luxus folding bike frame was in rough shape, and I could tell when I was tearing it down it was going to take a full respray. What I wasn't really prepared for was how much work simply cleaning it would be.
I'm not sure if it had been inside a smoker's home, or if it was just age and neglect, or whatever else the cause may be, but the frame was covered in a smelly, irritating funk. And of course I had to use some of the most noxious chemicals in the house to cut through the gunk, making it a doubly unpleasant job.
And it's way, way too cold and snowy to take it outside. So I've just been gutting it out, wearing a mask and nitrile gloves, and taking it in small doses.
The grime is gone. The first round of sanding is complete. I've treated the frame with a phosphoric acid based rust converter, which takes ferric oxide and chemically converts it to something paintable. The rust just turns black, and it's gone. This is great stuff for stopping rust in its tracks and prepping for paint. Just wear gloves, and a mask.
It's slow going and there's probably a fair bit of sanding left, but I'm starting to get it under control.


March 2021: Bad conditions and worse paint
Successful spray painting really requires a pretty narrow temperature band. So of course I decided to spray paint the Luxus folding bike in the dead of winter. It went about as well as you'd expect.

Everything started well enough. A few unseasonably warm days in February gave me a good opportunity to get it sprayed, and I took it. I was cooking along and the frame was looking good when disaster struck: on the last coat the paint crinkled. I had violated a second rule of painting and mixed paints. They did not get along well.
So after spraying and wet-sanding multiple coats, I now had to strip it all back. Honestly, taking after it with a stripping wheel may have been overkill. It's possible I could have just sanded it back. But at this point I didn't trust my base paint anymore.

Of course, by the time I'd stripped it all back the weather had turned. Painting outside was no longer an option.
Luckily the individual parts of the Luxus aren't very large, so I took a large plastic tub and improvised a small spray booth. I don't really recommend this. It's hard to get adequate ventilation, and there will be overspray. It worked okay for me, but really, you probably shouldn't try this at home.

It was slow going, too, since I could only paint small portions at a time. Add in wet-sanding between coats and painting this little frame took a long, long time.

Because I had sanded back the first respray attempt, and I had more defects than usual from working in the cramped corners, I wet-sanded pretty aggressively between coats to get the best possible surface. For paint I was using a Rustoleum performance enamel which worked well, especially coupled with a good (and compatible) primer. But still, if you want a really good coat, you've got to wet-sand and polish.
With enough elbow grease it started coming together, finally. At this point the painting and sanding are done, and I've gone over it with Turtle Wax Rubbing Compound and then polishing compound. I may give a few areas a bit more polishing, but it's looking good.
While my paint was drying I polished up the original chrome chainguard, and had a go at straightening a few wobbles in it. I'm no metalworker and it remains not-quite-straight. But also not bad. With it sitting in place you can finally start seeing it all come together.
The one upside to the long and painful painting process was that I had time to find a new bottom bracket, which was an adventure. You see, the bottom bracket on this thing was strange: smaller than an American BB as found on, say, a Schwinn cruiser, but larger than a normal square taper BB. And it was push fit. After a lot of digging I came to learn it's called a Thompson bottom bracket, and they're relatively common on Dutch city bikes. Who knew! So I made my best guesstimate on what the best spindle size would be to replace the cottered cranks and ordered one from Holland. And then I waited while it came all the way from Holland.

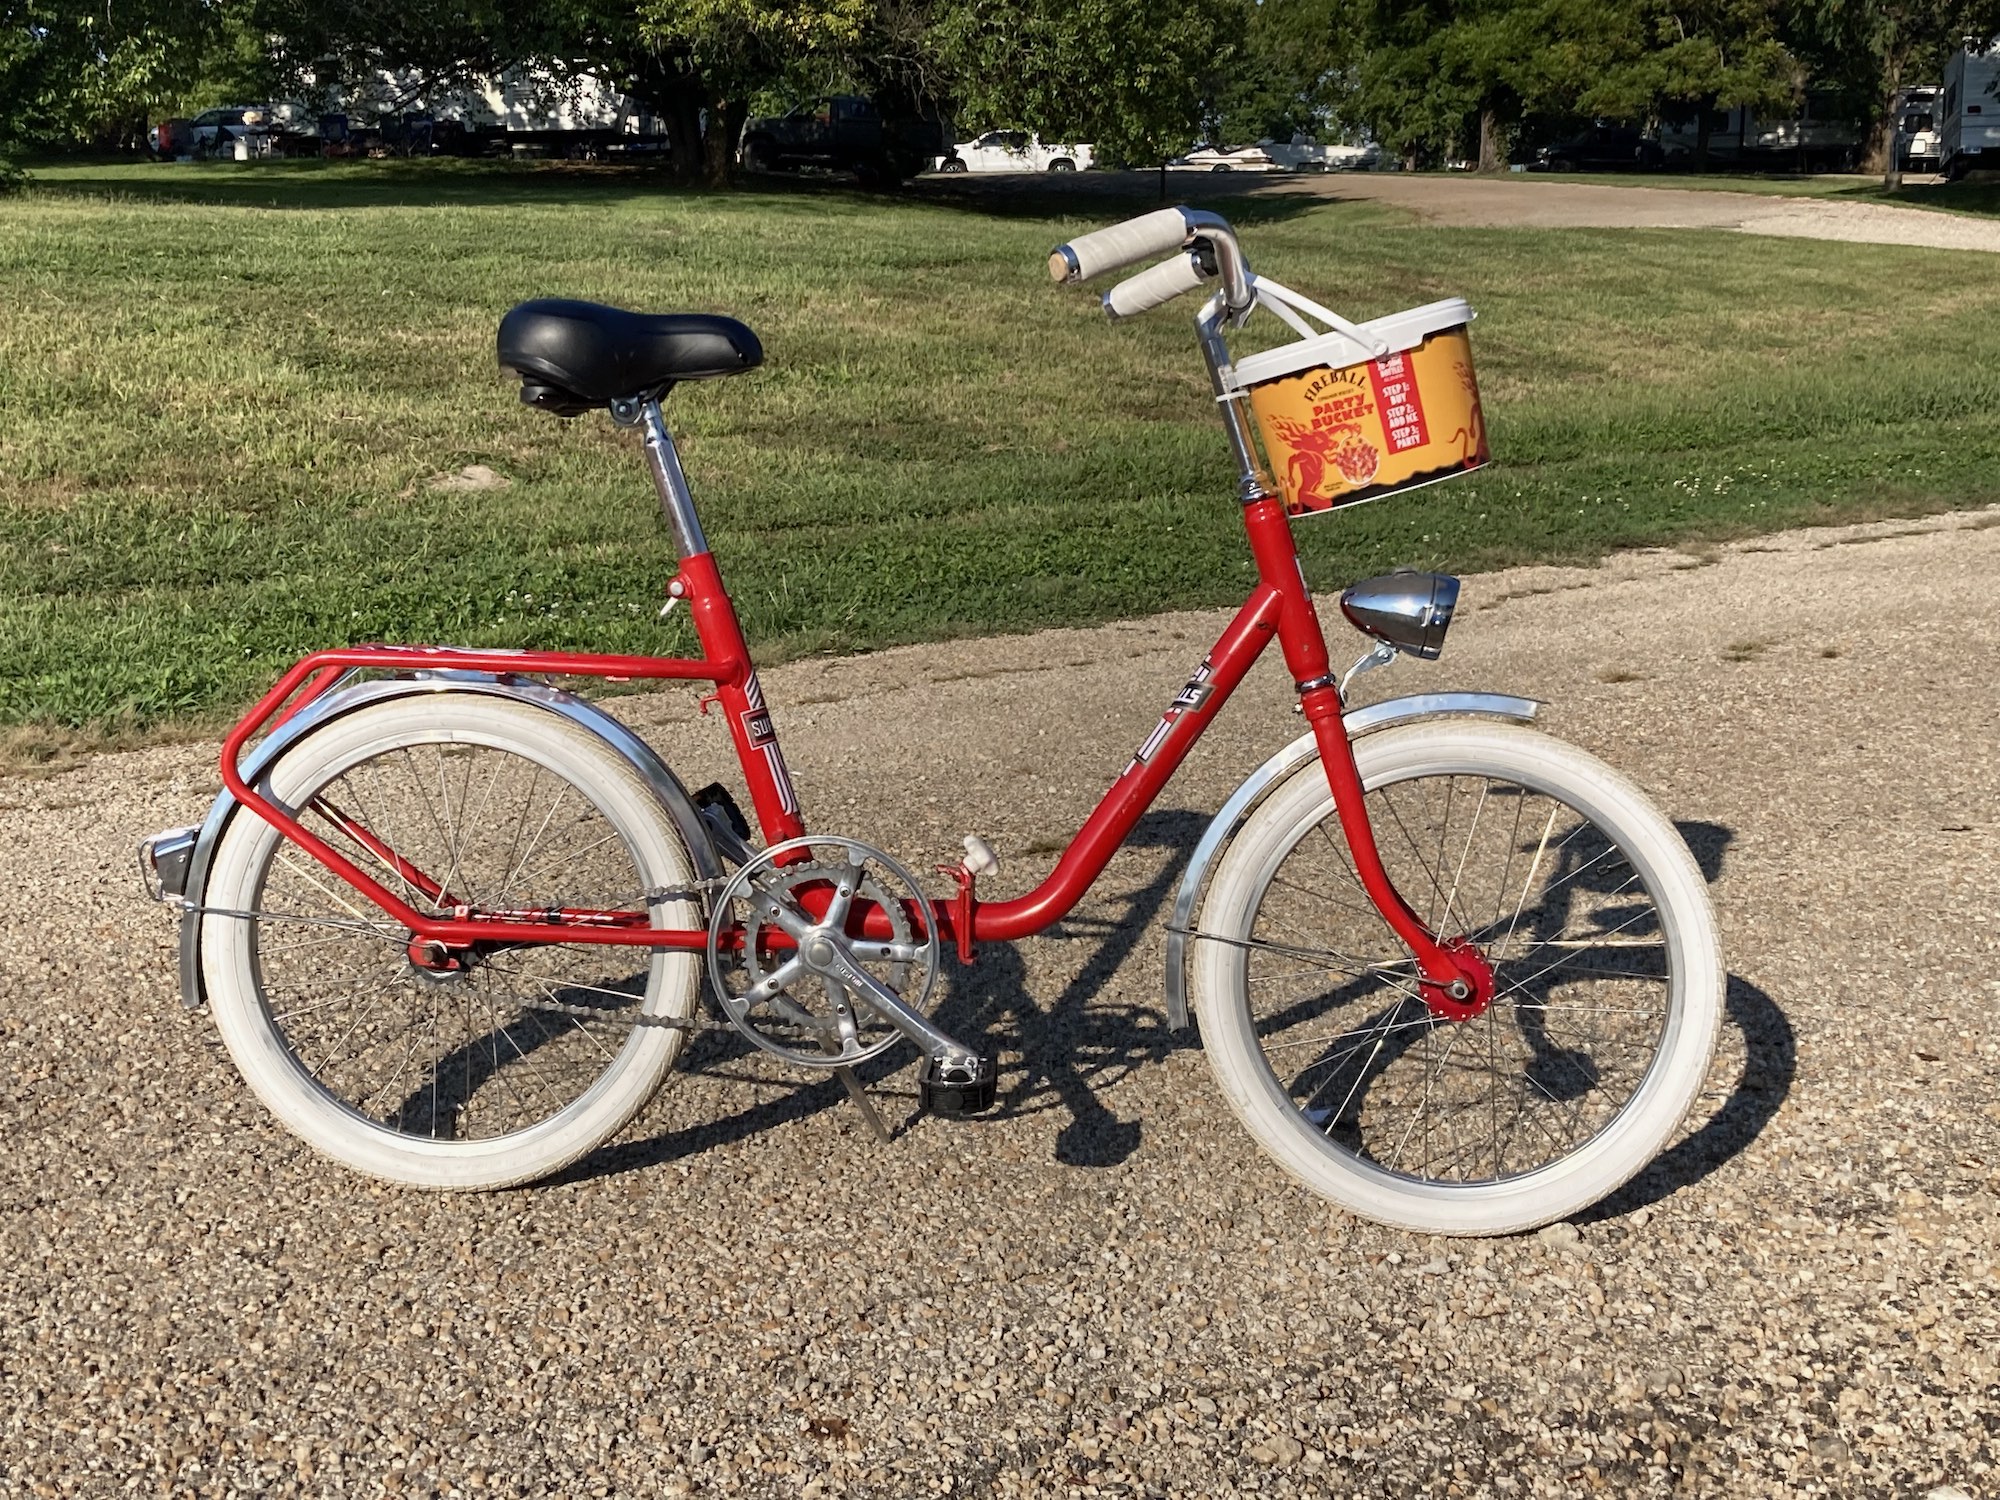
While the bottom bracket was tricky, I got completely lucky stumbling across some reproduction Luxus stickers being offered by a European seller on eBay. While they weren't an exact match I was happy to even get anything in the ballpark and I thought they looked great on the bike, especially with the new red paint.
As I started putting it back together, the first thing to do was install a new Tange headset to connect the frame and fork together. The second thing was to renovate the frame clamp knob with some white Plasti-Dip.


May 2021: The wheels go round and round.
By spring I had most of the rebuild under control. I was still trying to trim the Luxus' formidable weight by upgrading the original steel parts to aluminum where I could. The wheels in particular were a problem area. The originals weighed a ton and were completely shot anyway, so they had to be replaced. But as I learned most 20" wheels with coaster brakes have steel rims -- not an upgrade. I kept my eye on the market, though, and eventually found a cheap Schwinn with decent wheels.


September 2023
After a few years of enjoying the Luxus, I found that I had too many bikes cluttering the garage and my interest in camping was waning. It was time for it to go. Luckily, JC, the nice fella that runs Kansas City's Bright Lights for Kids Charity Ride spotted it and had to have it. So the deal was done. And somewhere out there in the world there is a (staged) picture of me riding it across the finish line at the ride!
As an Amazon Associate I earn from qualifying purchases. In other words, I get commissions for purchases made through links in this post. When you follow a link and buy something, it doesn't cost you anything extra, but I may make buck or two. So thank you! That said, any recommendations I make are my recommendations, based on my experience, and are not paid endorsements. I only point you toward the stuff I use, and if I don't like it, you'll hear about why.
Have something you'd like to say about this? Let me know! | Published in Bikes